Considering that all your movies have been acquired with filters mounted on a filter wheel you can just process each one separately (and therefore repeat the tutorial several times!), and then combine into one.
Once the 3 B&W videos (representing each primary color) are processed, you have 3 images whose names are, for example: "planet_red", "planet_green" and "planet_blue". They come from 3 different frames and they are not align together. Solve the problem by registering them (with the method "pregister" for Saturn, the Moon,...and "cregister" for Jupiter, Mars,...). To do this, you must first rename them to form a sequence of 3 images:
>load planet_red
>save sequence1
>load planet_green
>save sequence2
>load planet_blue
>save sequence3
Register the 3 images with "pregister" or "cregister" as I explained on this page:
>pregister sequence sequence 512 3
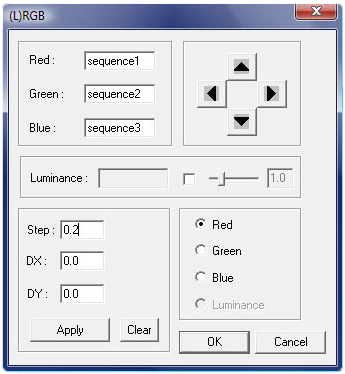
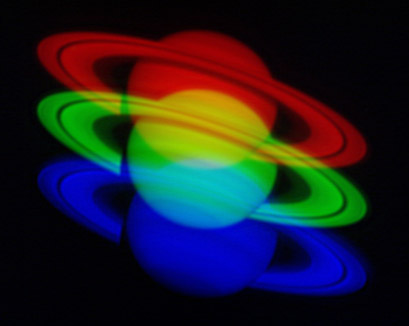
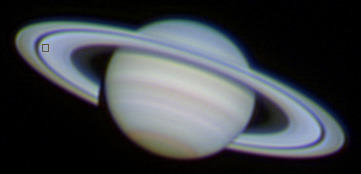
To add the 3 color images, go to the sub-menu "(L)RGB" of the "View" menu. A dialog box appears...Indicate the names of the 3 images GREEN RED and BLUE. Click on "Apply": a color image appears, resulting from the superposition of the 3 color images. Usually they are not perfectly aligned, the blue layer tends to "smear". This phenomenon is particularly visible on the image SATURN below (unfortunately here it is more a problem of the telescope's optics - chromaticism - than anything else because the blue layer continues to smear even after the correction).
If you have problems aligning the color layers, adjust the "Step" around 0.2 pixel and check the color layer on which you want to act. Then use the 4 arrows to move the image until it is perfectly stacked. By choosing a more than one pixel "Step", you can easily separate the tri-color image into its 3 primary colors. When you're done, click on "OK".
|
|
Save the resulting image:
> save SATURN
Everything is matter of taste...If you feel that the colors are not balanced, use the "black" and "white" commands of Iris. Draw a small rectangle in the background of the sky ...
...and type:
> black
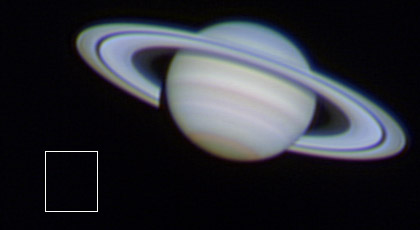
This brings the intensity of pixels in the 3 color images to 0 in the sky. You still need to balance the planet with "white". Draw a small square on an area of the planet that is supposed to be white (the main ring of Saturn, the polar cap of Mars, an area between the cloud bands on Jupiter)...
...and type:
> white
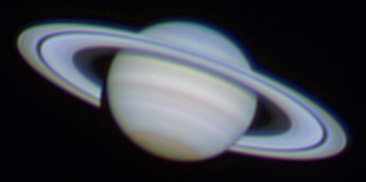
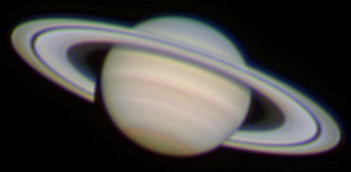
The image obtained after application of command white is much more balanced:
Save it!
> save afterblackwhite
If you are still not satisfied by the color's rendering you can always change the white balance manually. Go in the sub-menu "White balance adjustment" from the menu "View". Adjust the sliders until you get a good image.
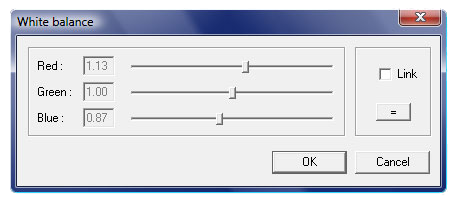
With this menu "View" you can also use tools well known in Photoshop, for example the gamma, contrast, saturation ...
![]() At this stage, either you're delirious because you've got a good image in front of your eyes
At this stage, either you're delirious because you've got a good image in front of your eyes![]() , or you're disappointed with the result
, or you're disappointed with the result ![]() . If you're in the first situation, then give yourself a pat on the back! Otherwise, I encourage you to persevere!
. If you're in the first situation, then give yourself a pat on the back! Otherwise, I encourage you to persevere! ![]() Getting a good planetary image isn't easy: it takes a lot of rigor, motivation and you also have to be lucky...because you can't control the weather!
Getting a good planetary image isn't easy: it takes a lot of rigor, motivation and you also have to be lucky...because you can't control the weather!
![]() Remember to save the final image!
Remember to save the final image!
> save saturn_processed