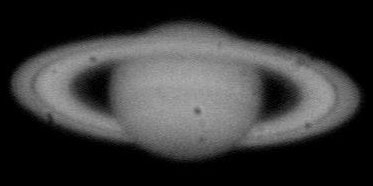
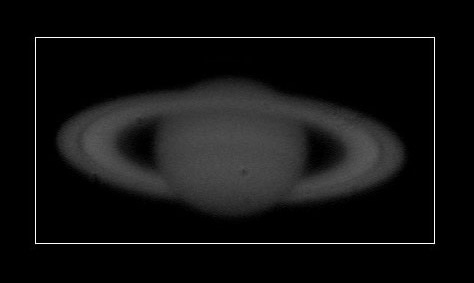
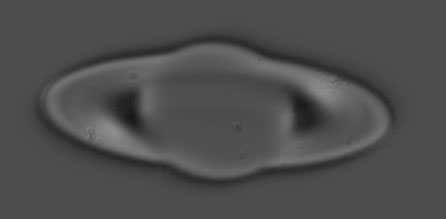
This image is a composite of hundreds of raw frames affected by dust. This situation should be avoided!
|
|
|
| There are some dust specks on this Raw image | This image is a composite of hundreds of raw frames affected by dust. This situation should be avoided! |
In order to remove the shadows of dust that ruin your images, you can use two techniques. The first requires some steps to be taken just after your imaging session. Otherwise, don't worry because you can still use the second technique in Iris. However, first read the following instructions for next time. The combined use of both techniques is a formidable weapon against dust!
If you planned nothing, go immediately to the 2nd technique in the bottom of this page: ![]() Shortcut
Shortcut
This video is recorded immediately after your imaging session and without changing the optical configuration of your setup (accessories, webcam,...). The flat-field video records the shadows of dust that were previously set down on the glass protecting the sensor of the webcam.
 |
|
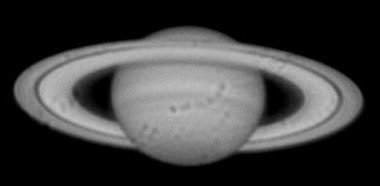
An image from the flat-field video. As you can see, the sensor was really dirty! I'm not guilty because I bought this webcam in poor condition from an amateur astronomer. Before imaging Saturn, I didn't know there was so much dust on the sensor! |
To learn how to make a good flat-field video, click here (soon available).
I propose two ways to process your flat-field video. The first is the fastest, the second is more rigorous. Choose the one you prefer! ![]()
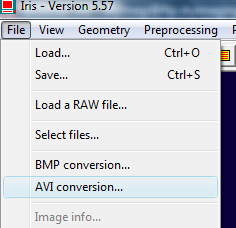
Go to the submenu "Avi conversion" on the menu "File".
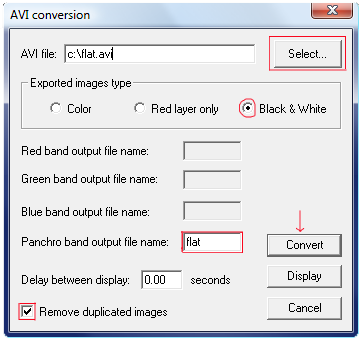
Enter first the path of the working directory for your flat-field .avi file. For example: « c:\flat.avi».
If your video is in B&W, check the option « Black&White » in the type of images exported.
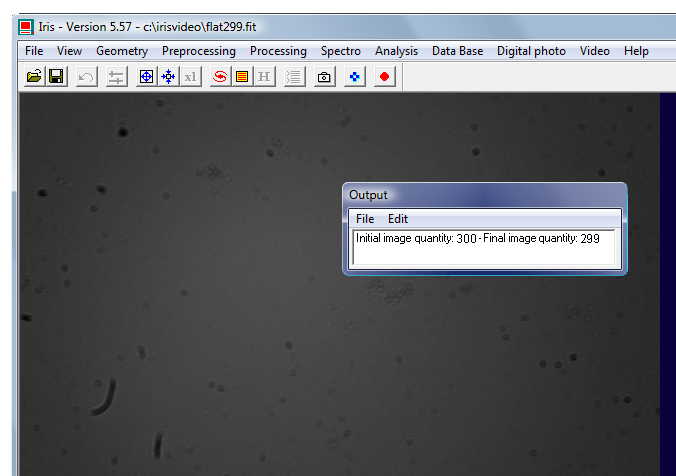
At the "Panchro band output file name" option, give the name "flat" to the video which will be produced. Check the "Remove duplicated images" box so that Iris does not take account of identical images created by the computer when it was in saturation. Then click on "Convert".
After converting the images, Iris shows the number of final images in the output window (here there are 299).
Now use the command window ![]() to launch the following instructions. Add the flat-field images together with the "add_norm" command (there are 299 images in my example).
to launch the following instructions. Add the flat-field images together with the "add_norm" command (there are 299 images in my example).
>add_norm flat 299
Save the result:
>save FLAT
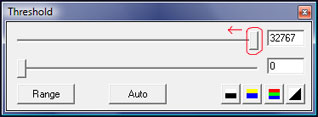
The image that appears after the addition is much too light: you have to adjust the threshold with this magic command:
>visu 32767 0
Then multiply the "FLAT" by a value that is at the same level as the globe of Saturn, thanks to the command "mult" followed by a ratio below 1.
NB : The initial level of the "FLAT" image is 31000. You have to solve the equation 31000 * X = 231 to find X, the constant to use in order to get a level i in the flat-field image equal to the Saturn's level. ![]() Here you get:
X=0.0075
Here you get:
X=0.0075
Multiply the flat-field by the value X:
>mult 0.0075
Then use the window setting thresholds display with the mouse to balance the image (window at the bottom right of the screen). Click on the flat-field image to see that the level "i" is normalized with the level of Saturn.
Save the resulting flat-field image:
>save FLATEND (remember its name!) ![]()
A more rigorous approach is the creation of a median flat-field that requires an offset, in addition to your flat-field video.
To learn how to make a good offset video as well as the median flat, click here (soon available).
Then, check the resulting flat-field:
>load bw1 (first image of the video)
>div FLATEND 231
Note : To find the coefficient divisor, 231 here, you can also run the "stat" command on the "FLATEND" image and note the value of the median. This is the divider ratio to be used for the flat-field division.
Conclusion : it works although it isn't perfect! Dust on the sensor is smaller. ![]()
The last operation is the flat-field correction of the set of your planetary images:
>div2 bw FLATEND bwflat 231 1199
With :
• "bw" the name of the input sequence.
• "FLATEND" the image to substract to the input sequence.
• "bwflat" the output sequence you get after running the "div2" command.
• "231" the level of FLATEND and the center of Saturn, which is the divider ratio of the « div2 » command.
• "1199" the number of images of the input sequence.
If some dust remains ![]() or you have not prepared to use the first technique
or you have not prepared to use the first technique ![]() , you have to make a "virtual" flat with Iris.
, you have to make a "virtual" flat with Iris.
If you are happy with the result you got with the "real flat" in the first technique and you don't feel the need to use the second technique to improve your image, go back to the previous page by clicking here. ![]()
![]() You can use this technique only if you have a small shifting (a few pixels) of the planet along the video. If you have a very high quality mount the planet won't move on the sensor and the "flat" command will produce bad results. The solution is to shift the planet on the sensor during the acquisition time of the video. This technique doesn't work with the Moon.
You can use this technique only if you have a small shifting (a few pixels) of the planet along the video. If you have a very high quality mount the planet won't move on the sensor and the "flat" command will produce bad results. The solution is to shift the planet on the sensor during the acquisition time of the video. This technique doesn't work with the Moon.
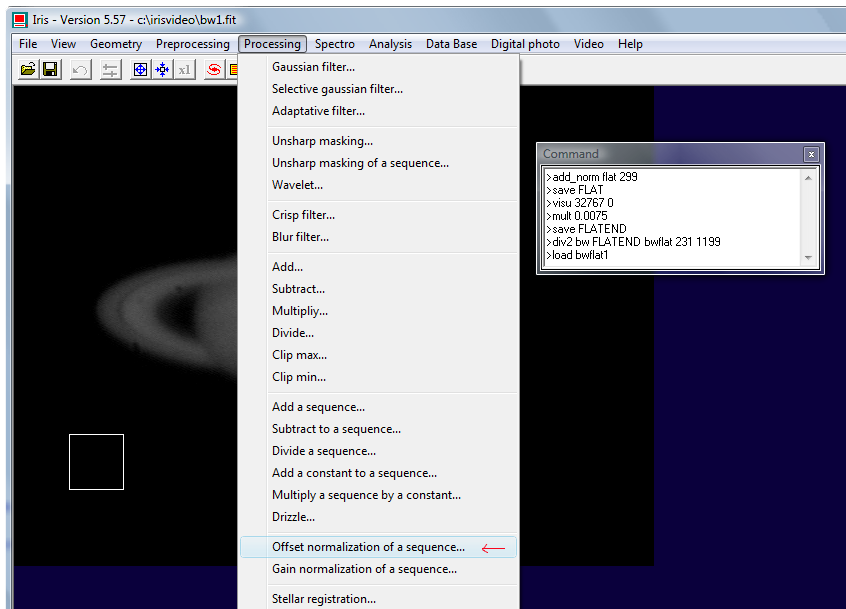
Normalize the background of the sky on the images of the planet. The principle is to choose a reference area of the image by selecting a small square in the bottom of the sky (the goal is to avoid the alteration of the useful part of the image thereafter, the planet) with the mouse, and setting up the normalization of the sky in order for it to become well black. This will help you with the further stages of flat-field processing. You can use one of the 3 following methods, the last one being more rigorous. ![]()
Go to the sub-menu "Offset normalization of a sequence" from the menu "Processing".
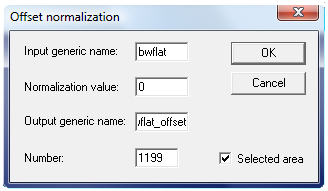
Enter the input generic name of the start sequence of images for which you've already made the "real flat" correction: "bwflat".
If you didn't make a flat-field video just after your imaging session and you have a problem with dust, choose the sequence "bw" from the beginning of the tutorial.
The normalization value is set to 0. The output generic name is "bwflat_offset" and the number of images is 1199 (value to adapt to your video). Check the box «selected area» (to do this, you had to previously draw a small square in the background of the sky).
Wow, you get your video with a uniform sky! ![]()
Start by drawing a small square in the background of the sky.
Then use the command "noffset3" directly from the command window of Iris ![]() . It is equivalent to the first method.
. It is equivalent to the first method.
Syntax: noffset3 [input sequence] [output sequence] [normalization value set to 0] [number of images in the sequence]
Thus:
>noffset3 bwflat bwflat_offset 0 1199
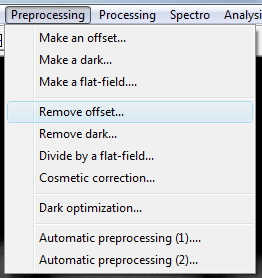
If you used method number 2 to get a "real" flat-field, you always have the flat median to normalize the sky's background. Go to the submenu "Remove offset" from the menu "Preprocessing".
 |
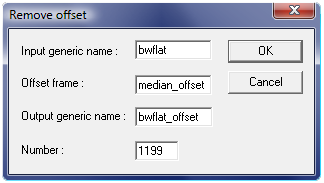 |
• Input generic name: bwflat
• Offset frame: median_offset
• Output generic name: bwflat_offset
• Number: 1199
Info: the equivalent in command line is:
>soust2 bwflat median_offset bwflat_offset 0 1199
>load bwflat_offset1
Note : Iris needs the file SHIFT.LST to do the virtual flat-field, because it has to know the shifts in X and Y of the planet along the video.
You can create it with the "PREGISTER" and "CREGISTER" commands.
Syntax: pregister [input sequence][output sequence][size of the selection window][number of images to align]
Info :
Source : Christian Buil
"Performs the registration of [NUMBER] planetary images having the generic name [IN] using an intercorrelation method. The size for the intercorrelation is given by [SIZE]. It must be a power of 2 (128, 256, 512...). The size should be larger than the planet diameter. [OUT] is the generic name of the output images. First use PREGISTER to define a selection rectangle around the planetary disc (drag with the mouse). Note that the size of rectangle is not important (the rectangle marks only the center of interest of the image)".
Thus, first select a frame around Saturn (or around a lunar crater), then run the command "pregister". The output sequence is "bwflat_offset_registered".
Run :
>pregister bwflat_offset bwflat_offset_registered 512 1199
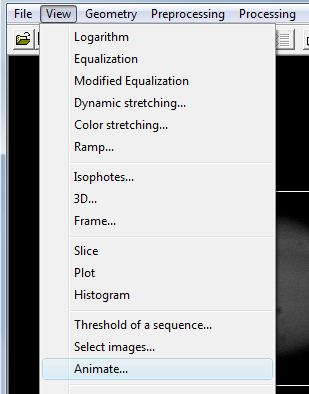
To check the correct registration :
Menu: View > Animate
 |
 |
Indicate:
• The sequence: bwflat_offset_registered
• The number of images in the sequence (here, 1199)
• Delay: 50
So we can appreciate the quality of the registration and this highlights the smaller problem. It is very effective and it is also much more convenient than manually loading the images one after the other...
Then select the best images of the non-registered sequence (command "BESTOF") and rank them according to their quality (command "select").
Thanks to this method, the virtual flat-field you get with the "FLAT" command will be efficient as this instruction accepts only 100 images to calculate the virtual flat-field. If the images have been mixed, the first 100 will be more heterogeneous than those on the output sequence, so that the "FLAT" command will be more effective. This command looks at everything on the globe of Saturn that remains fixed on the 100 images, so if Saturn moves a lot, more dust will be detected.
Selection:
Syntax: bestof [name][number]
>bestof bwflat_offset 1199
Note: Select first a rectangle around Saturn with the mouse before launching the "bestof" command.
Classification of flat-field images in descending order of quality:
Syntax: select [input][output]
>select bwflat_offset bwflat_offset_select
To achieve the virtual flat-field:
You can now do the virtual flat-field thanks to the FLAT command, with a maximum of 100 images and using the sorted sequence "bwflat_offset_select":
Syntax: FLAT [NAME] [HL] [LL] [LEVEL] [#ITER] [#IMAGE]
>flat bwflat_offset_select 32767 0 231 3 100
You should always use the "32767" and "0" values (the max and min levels accepted by Iris). "231" is the level of the flat-field image that will be produced by the "flat" command so you can then apply a flat-field correction to the images of your planetary sequence. This is the same number that I use since the beginning of the processing. "3" is the number of iterations chosen to run the "flat" command and 100 is the number of images that can be taken into account.
Note: Wait (with the egg timer), don't worry if nothing seems to happen. The flat-field image is coming soon! Don't forget to save it on your hard disk with the "save" command.
>save VIRTUAL_FLAT
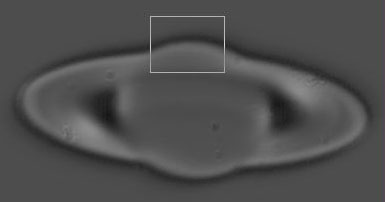
It's now time to do the most painful step because you have to clean the image ![]() : only dust specks have to be seen and nothing else! You should remove any residual contour of the disk of the planet. Use the command "FILL2": first you draw a rectangle with the mouse around the area you want to delete, then you run the command "fill2" (dozens of times, with different sizes of rectangles). The operation takes about 10 minutes, because there are many small areas to remove around each dust speck.
: only dust specks have to be seen and nothing else! You should remove any residual contour of the disk of the planet. Use the command "FILL2": first you draw a rectangle with the mouse around the area you want to delete, then you run the command "fill2" (dozens of times, with different sizes of rectangles). The operation takes about 10 minutes, because there are many small areas to remove around each dust speck.
Nota: Note: If you want to throw your computer out the window, this is normal. ![]() However, keep patience, thinking that you can get by now!
However, keep patience, thinking that you can get by now!![]()
 |
 |
|
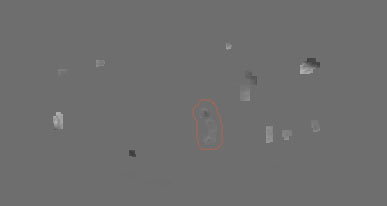
| Draw a rectangle before erasing an area with "fill2". | Example of a bad result (I show here only the useful area of the image). Only the area circled in red is correct, as it delimits dust very well. |
Syntax: fill2 [level] with "level" the level of the virtual flat-field you got previously thanks to "stat".
>fill2 231
Make sure to save the image (would be a pity, after so much patience!)
>save VIRTUAL_FLAT_END
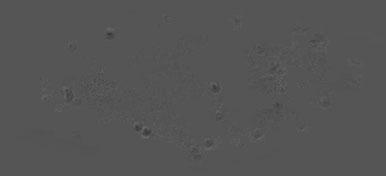 |
Here is a good virtual flat-field! |
Check the virtual flat-field on an image of the non-sorted sequence (but for which you have removed the offset signal of the camera) "bwflat_offset" obtained just before the step of creating the virtual flat-field.
>load bwflat_offset1
>div VIRTUAL_FLAT_END 231
Note : 231 should match the value of the median provided by the STAT command on the photo VIRTUAL_FLAT_END.
See if there is an improvement. Test the final virtual flat-field on several images of the sequence "bwflat_offset. If the virtual flat-field doesn't work, delete still areas with "fill2" or repeat the process until the virtual flat-field is useful.
Note : If you change the virtual flat-field, don't forget to save it under another name with the command "save"! In my case, the modified output flat-field is: VIRTUAL_FLAT_END2
Division of the sequence by the virtual flat-field: :
Then, divide the whole sequence (bwflat_offset) by the virtual flat-field:
>div2 bwflat_offset VIRTUAL_FLAT_END2 bwflat_offset_end 231 1199
With "bwflat_offset_end" the sequence produced after division by the virtual flat-field.
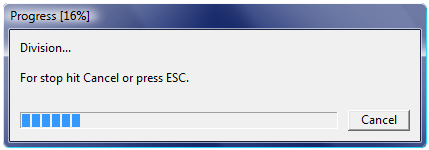
A window appears showing the progress of calculations ... be patient. ![]()
Lancez:
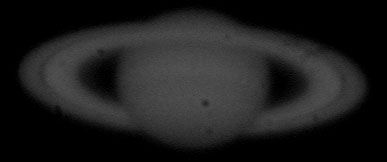
>load bw1 (first frame of the sequence, with dust)
>load bwflat_offset1 (first frame of the sequence, processed with the "real" flat-field, only for those who have used the first technique).
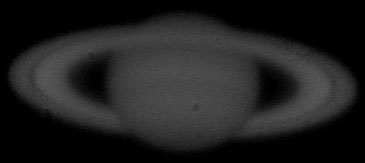
>load bwflat_offset_end1 (first frame of the sequence, 2 flats which have been used: the real and virtual).
 |
 |
|
| bw1 | bwflat_offset1 | |
 |
||
| bwflat_offset_end1 |
The improvement is not negligible. The virtual flat-field produced by Iris has only been used to eliminate the shadows of dust on the globe of the planet, because of the poor quality of the virtual flat-field obtained after the fast cleaning step (with "fill2"). A more rigorous cleaning would have given better results. The waste will be eliminated automatically by Iris at later stages of processing.
Note: The result could be even more effective if I used my "excellent virtual flat-field". Here, I simply use my not-so-good virtual flat, therefore the difference between the step with the real flat-field and with the virtual flat-field is not very big. Several times, I wasn't able to make real flat-fields (I forgot to make a video of dust ...), and I must say that the technique of virtual flat-field in Iris is very powerful in these cases !
|
|