The preprocessing of images is a lengthy stage and therefore difficult to perform manually. There is an alternative to the manual method: boxes of commands. I'll explain to you how it works. These commands don't just automatically align images of the sequence: they sort them according to their qualities and add them together to form an image with a better signal to noise ratio (the final image is much less noisy than the raws)...
![]() If you use the RGB technique (B&W camera with a filter wheel) you have to repeat what will follow for each B&W film representing a primary color, taking care to note the names of good sequences and their respective numbers of images. I explain here how to proceed with a sequence of images I have named "bwflat_offset_end". Users of the LRGB method have to read this page only once.
If you use the RGB technique (B&W camera with a filter wheel) you have to repeat what will follow for each B&W film representing a primary color, taking care to note the names of good sequences and their respective numbers of images. I explain here how to proceed with a sequence of images I have named "bwflat_offset_end". Users of the LRGB method have to read this page only once.
The automatic procedure always uses the same naming sequences at different stages of processing. One problem you might encounter can be disastrous- it will permanently affect your sequences of images. Prevention is better than cure, thats why I suggest you save your input sequences using another generic name. If something goes wrong you can still recover your input images to make corrections.
To do this, you can, for example, use "mult2" which multiplies each image of the input sequence by a coefficient that we take equal to the unit, to avoid the modification of the output images. In return, "mult2" generates an output sequence: our backup.
Syntax: mult2 [input] [output] [coeff] [number of images in the sequence]
Enter this command:
>mult2 bwflat_offset_end backup_bw 1 1199
Info : Do not place any spaces or special characters in the text [message]
>echo Registration
Then, load the first image of the sequence:
>load bwflat_offset_end1
Also useful with videos of Uranus and Neptune if these last two are noisy.
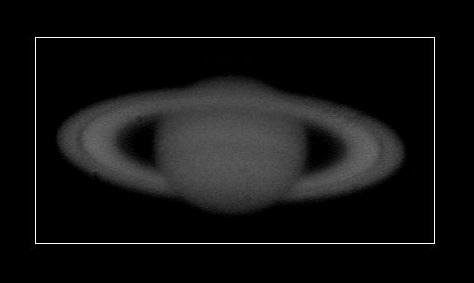
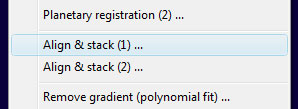
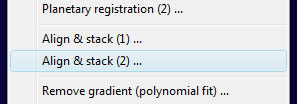
First select a frame around Saturn and then go to the sub-menu "Align & Stack (1)" under the menu "Processing". For the Moon, you should select a crater present in all images of the video.
 |
 |
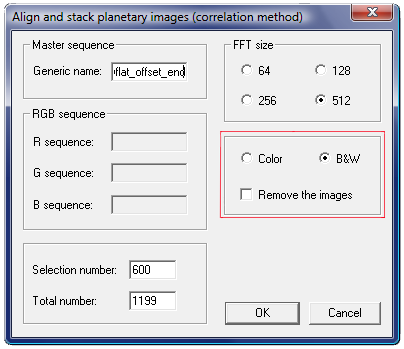
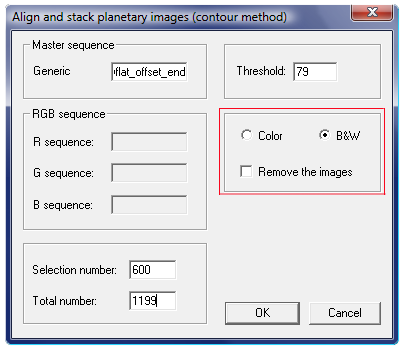
A dialog box will appear. Check the "B&W" box and uncheck "Remove the images". Fill in the name of the master sequence, namely "bwflat_offset_end".
The "Selection number" is nothing more than the number of images that you want to add at the end of the process and "Total number" is, as its name indicates the total number of images in the sequence.
The "FFT size" indicates the size of the window in which Iris will do its calculations. It must be a power of two (128, 256, 512,...). The window must be greater than the diameter of the planet. Saturn being large in this example, a size of 512 is recommended (but it increases the processing time). ![]() ).
).
Iris will then align (Registration) all images in the sequence bwflat_offset_end using the "pregister" command. They will be selected and sorted according to their qualities by automatically using the "bestof" and "select" commands.
Finally, a number of images (defined by the "Selection number") of the input sequence will be added together.
![]() You get therefore:
You get therefore:
If the image that appears on the screen is much too light use the "visu" command:
>visu 32767 0
Save the resulting image:
>save black_white
If the image is saturated (for example here, an image which is too bright) you can use the command "mult" with a coefficient less than 1. Save the resulting image if you like it.
>mult 0.8
Also useful with videos of Uranus and Neptune if these last two are noisy.

Run:
> mouse_select 1 1 640 480
See you then in the sub-menu "Align & Stack (2)" of the menu "Processing".
A dialog box will appear. Check the "B&W" box and uncheck "Remove the images". Fill in the name of the Master sequence: "bwflat_offset_end".
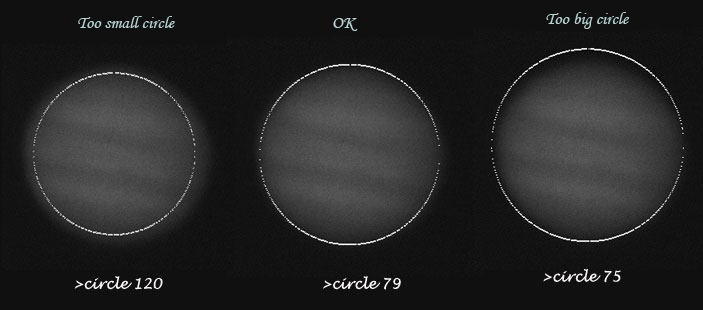
The threshold is 79 in my example, the "Selection number" is nothing more than the number of images that you want to add at the end of the process and "Total number" is the total number of images in the sequence.
Iris will then align (Registration) all images in the sequence bwflat_offset_end using the "cregister" command. They will be selected and sorted according to their qualities by automatically using the "bestof" and "select" commands.
Finally, a number of images (defined by the "Selection number") of the input sequence will be added together.
![]() You get therefore:
You get therefore:
If the image that appears on the screen is much too light use the "visu" command:
>visu 32767 0
Save the resulting image:
>save black_white
If the image is saturated (for example here, an image which is too bright) you can use the command "mult" with a coefficient less than 1. Save the resulting image if you like it.
>mult 0.8
Because you have not deleted the intermediate files you can still add a different number of images with the command "add_norm". For example, to add 800 images:
Syntax : add_norm [name] [number]
>add_norm @s 800
Remember to save the result!
 To check for the correct registration :
Menu: View > Animate
Indicate:
- The sequence: @S
- The number of images in the sequence (here, 1199)
- Delay: 1
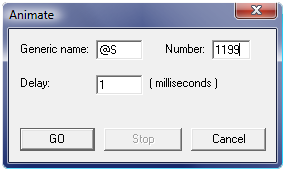
So we can appreciate the quality of the registration and this highlights the smaller problem. It is very effective and it is also much more convenient than manually load the images one after the other...
If you notice that the automatic registration was poorly conducted, use the manual methods of registration described in Step 7 on the sequence of images that you had previously saved (ie backup_bw). The images being now well registered you can repeat the automatic procedure described on this page (the automation of the procedure asks you to do a new registration, it isn't worse because it will refine that already done manually and the risk of failure is very low as you start from a sequence already registered). 
![]() If you use the RGB technique (B&W camera with a filter wheel) you have to repeat the operation for the other 2 B&W videos representing the other two primary colors, taking care to note the names of good sequences and their respective number of images.
If you use the RGB technique (B&W camera with a filter wheel) you have to repeat the operation for the other 2 B&W videos representing the other two primary colors, taking care to note the names of good sequences and their respective number of images. ![]() Go back!
Go back!
Once the 3 B&W videos processed, you have got 3 images whose names are for example: "red", "green" and "blue". You can take ![]() the next step (wavelets, to be applied to each of 3 images, giving them another name after the passage of wavelets!).
the next step (wavelets, to be applied to each of 3 images, giving them another name after the passage of wavelets!).
![]() If you have applied the LRGB's technique (B&W camera for details + color web cam), then you can go directly to the wavelets.
If you have applied the LRGB's technique (B&W camera for details + color web cam), then you can go directly to the wavelets.